Introduction # Have you ever ran into a situation where you wanted to version your application, but doing git tag and making a separate commit for updating version number was a two-step process? Isn’t that kinda frustrating? You can even miss to update the version number in your code, which happens to be with me a lot. In this post we’ll see how to convert this two-step process into one.
In a previous post we discovered how can we run commands on each push and check if the test is passing against multiple versions of go. This is a continuation of the same concept. We are going to deploy our code to Elastic Beanstalk, straight from git push.
Elastic Beanstalk is nothing but a wrapper around it’s EC2 infrastructure. It is a developer-centric view of deploying an application on AWS. Developers just have to push the code and Beanstalk can take care of Auto Scaling Group, Elastic Load Balancer, databases etc. No need to manage infrastructure manually.
You can’t think of deploying your application to production without testing it.
Neither you can manage a large codebase with confidence without it.
Let us go through some basics of unit testing in golang.
This post is structured in the following manner:
unit testing basics in golang (jump) inbuilt code coverage command understanding subtests and helper function (jump) Travis CI integration (jump) running test against multiple version of go Please connect with me on LinkedIn and let’s get started.

Me Before # 1 2 3 4 5 6 7 8 9 10 11 12 FROM golang:alpine WORKDIR /go/src/github.com/santosh/qagine COPY . . RUN go get -d RUN CGO_ENABLED=0 GOOS=linux GOARCH=amd64 go build -a -installsuffix cgo -o app . EXPOSE 8080 CMD ["./app"] Me building the image.
$ docker build -t sntshk/qagine . Sending build context to Docker daemon 259.6kB Step 1/7 : FROM golang:alpine ---> 760fdda71c8f Step 2/7 : WORKDIR /go/src/github.com/santosh/qagine ---> Running in e2cf75dd1655 Removing intermediate container e2cf75dd1655 ---> 8b4955b2e885 Step 3/7 : COPY . . ---> 43cd9a41efcb Step 4/7 : RUN go get -d ---> Running in 55c01f67fa99 go: downloading github.com/gorilla/mux v1.7.4 go: downloading go.mongodb.org/mongo-driver v1.3.2 go: downloading github.com/dgrijalva/jwt-go v3.2.0+incompatible go: downloading golang.org/x/crypto v0.0.0-20200420201142-3c4aac89819a go: downloading github.com/pkg/errors v0.8.1 go: downloading github.com/xdg/scram v0.0.0-20180814205039-7eeb5667e42c go: downloading github.com/golang/snappy v0.0.1 go: downloading github.com/go-stack/stack v1.8.0 go: downloading github.com/klauspost/compress v1.9.5 go: downloading golang.org/x/sync v0.0.0-20190423024810-112230192c58 go: downloading github.com/xdg/stringprep v0.0.0-20180714160509-73f8eece6fdc go: downloading golang.org/x/text v0.3.2 Removing intermediate container 55c01f67fa99 ---> 038b29b80653 Step 5/7 : RUN CGO_ENABLED=0 GOOS=linux GOARCH=amd64 go build -a -installsuffix cgo -o app . ---> Running in 122df20d3329 Removing intermediate container 122df20d3329 ---> f4616dc3fe1c Step 6/7 : EXPOSE 8080 ---> Running in 4258f9aac8c6 Removing intermediate container 4258f9aac8c6 ---> b643c7e16c0b Step 7/7 : CMD ["./app"] ---> Running in 948fa65b093b Removing intermediate container 948fa65b093b ---> 621b8e5396ad Successfully built 621b8e5396ad Successfully tagged sntshk/qagine:latest The sweet size of the image is 525MB.
Introduction # Why wait for CI/CD services to run your test? And in case you’ve already submitted a pull request, you’ll have to push another commit to fix the cause of failed test held by CI provider. You can prevent that by running unit tests locally before every commit.
I’m building my website using the golang. On every git push, Travis CI runs test and create a docker image and pushes it to DockerHub. My plan is to pull that image every time it is pushed and deploy it to some production server.
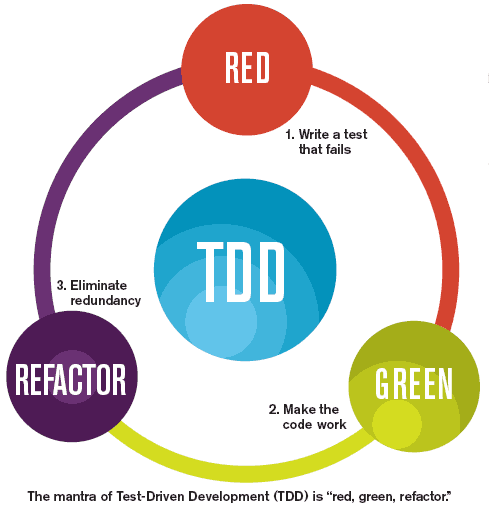
In this post, I’ll show a glimpse of software testing and how test-driven development works in a nutshell.
Why Do We Test # Every little software grows big, trying to solve more problem regarding its particular domain. It faces bugs in the way which also needs to be taken care of.
As software grows big. It becomes harder to go and test if every part of the software is behaving the way it should. Take the example of a Django application. If the manual path is taken, one is supposed to test every layer of the application, including Model and Views against each if and else in the control flow.
In last post, I expressed how we can export a single file from a git repo the its own repo, preserving their commit history. In this post, I will tell how I dealt with extension-less file to ignore them in my repo.
I have recently started learning C++ from Udemy, it’s a free course. I encourage you to take it if you are willing to learn C++. I was following the instructions on Linux. And special thing about working with C or C++ in Linux is that the executable you get has no extensions in it, unlike Windows, which has .exe extension.
Today I will walk through how you can take out a single file from a git repository and create its own repository with all the file commit history preserved.
When I started working at my workplace I initialized Maya script directory to git. At that time one repo was looking enough for entire folder. But when I started working with a tool, I realized an entire repo would be good for that tool. But it was too late to create another repo because I had already made 12-15 commits on that tool and I don’t wanted to lose the changes I made.
When I first came to know about this, I was like:
{{ #< twitter user=“sntshk” id=“816562426833289216” >}}
What is Squashing # The process of merging commits together is called squashing. There are many commands to do the same thing, but I will discuss the one I learned. There’s a read more section below if you want to know more about this topic.